

A step-by-step setup for a website sales agent: what knowledge to add, which questions to show on each page, which next-step buttons to offer, and what a good lead alert contains.
Most visitors on a pricing page leave without saying a word. They have a question, such as "which plan fits a team of 20?" or "can I try it first?", and nobody is there to answer it. A website sales agent is there to answer it, suggest the option that fits, and hand you the lead while the visitor is still interested.
This guide walks through a real setup for a software company selling plans. The same steps work for a service business. Shops with product catalogs have a slightly different setup, covered at the end.
What a good sales agent does, and what it should not do
A useful sales agent does four things in a conversation:
- Understands the need. It asks one short question when it needs to, such as team size, use case or budget.
- Recommends with a reason. "Growth fits, because you expect about 300 conversations a month and Starter includes 200."
- Offers the next step you chose, for example start a trial, book a demo, or leave contact details.
- Sends you the lead with context, so you know what they need before you reply.
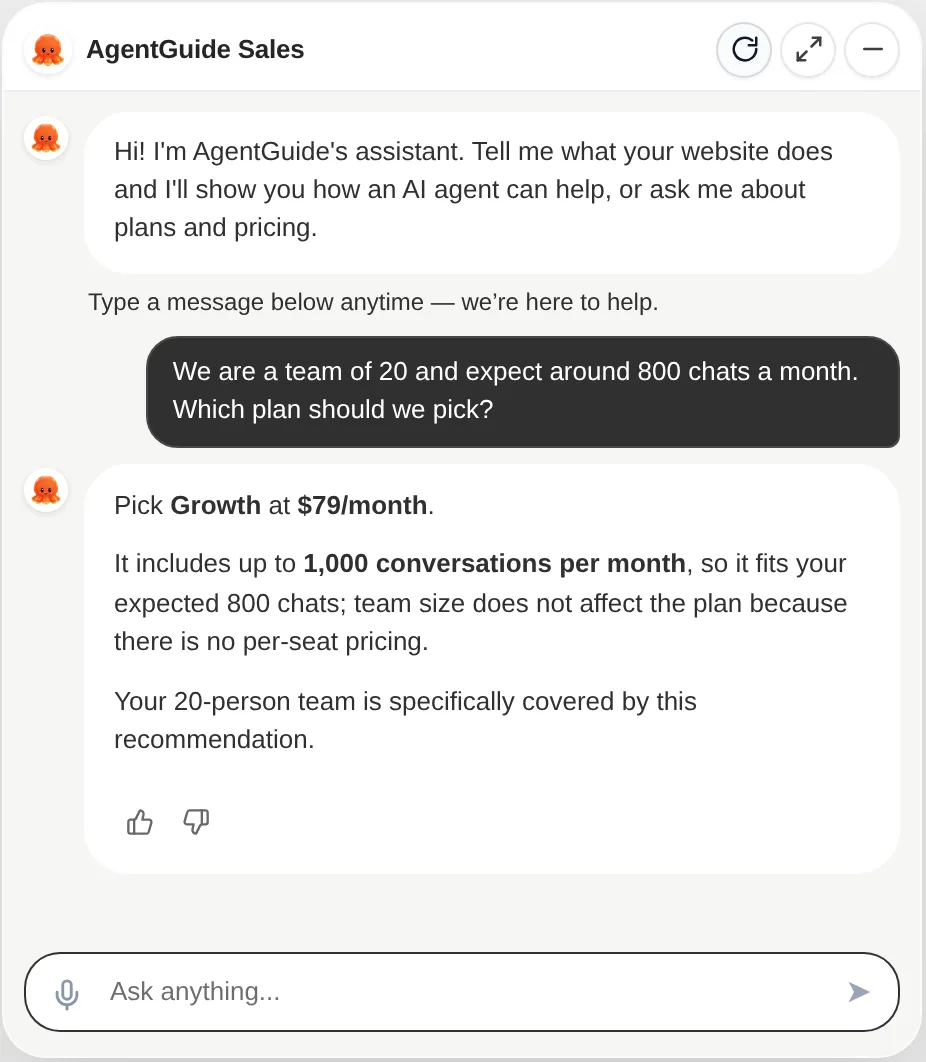
It should not invent prices, discounts or features, and it should not turn every message into a pitch. In AgentGuide, the Sales Agent answers only from the knowledge you select for it. When something is not in your knowledge, it says so and offers your contact option instead of guessing.
Step 1: Add knowledge that answers buying questions
Go to Knowledge → Add knowledge. You have three sources:
- Import from website: your pricing, FAQ and policy pages, or your products.
- Upload files: PDF, DOCX, TXT or MD documents, or a product list as CSV or JSON.
- Add manually: write an answer, or use Add a plan or service to enter a plan with its price and what it includes.
What to include:
- Every plan with its price and limits, in plain sentences. Put the price next to each plan name, not only in a big comparison table. Short, self-contained sections are easier for an agent to find than one wide table.
- Who each plan is for. "Starter: one job, sales or support." This is what turns a price list into a recommendation.
- The questions buyers ask: trial, payment methods, cancellation, refunds, onboarding help, security.
- What you do not offer. If you do not integrate with a certain tool, say so. The agent can only be honest about what it knows.
Organize it with knowledge groups, for example a "Sales" group, and choose that group on the agent.
Step 2: Create the agent
In Agents → Create agent, choose Sales. On Growth and higher plans you can choose Sales & Support, one agent that switches between selling and helping customers depending on what they ask. The type cannot be changed after the agent is created.
Then, on the agent page:
- Knowledge → Change selection: pick your sales group.
- How your agent should talk (optional): tone and rules. For example: "Reply in the visitor's language. Recommend one plan with a reason. Never offer discounts."
Step 3: Choose the next steps
Under Help customers take the next step, pick what interested visitors see:
- Buy, book, or sign up (open a link): send them to your sign-up, checkout or booking page. Label it like an action, for example "Start free" or "Book a demo".
- Call or message directly: phone, WhatsApp, Zalo or email.
- Leave contact details (contact form): collect name, email, phone and company, with your consent message.
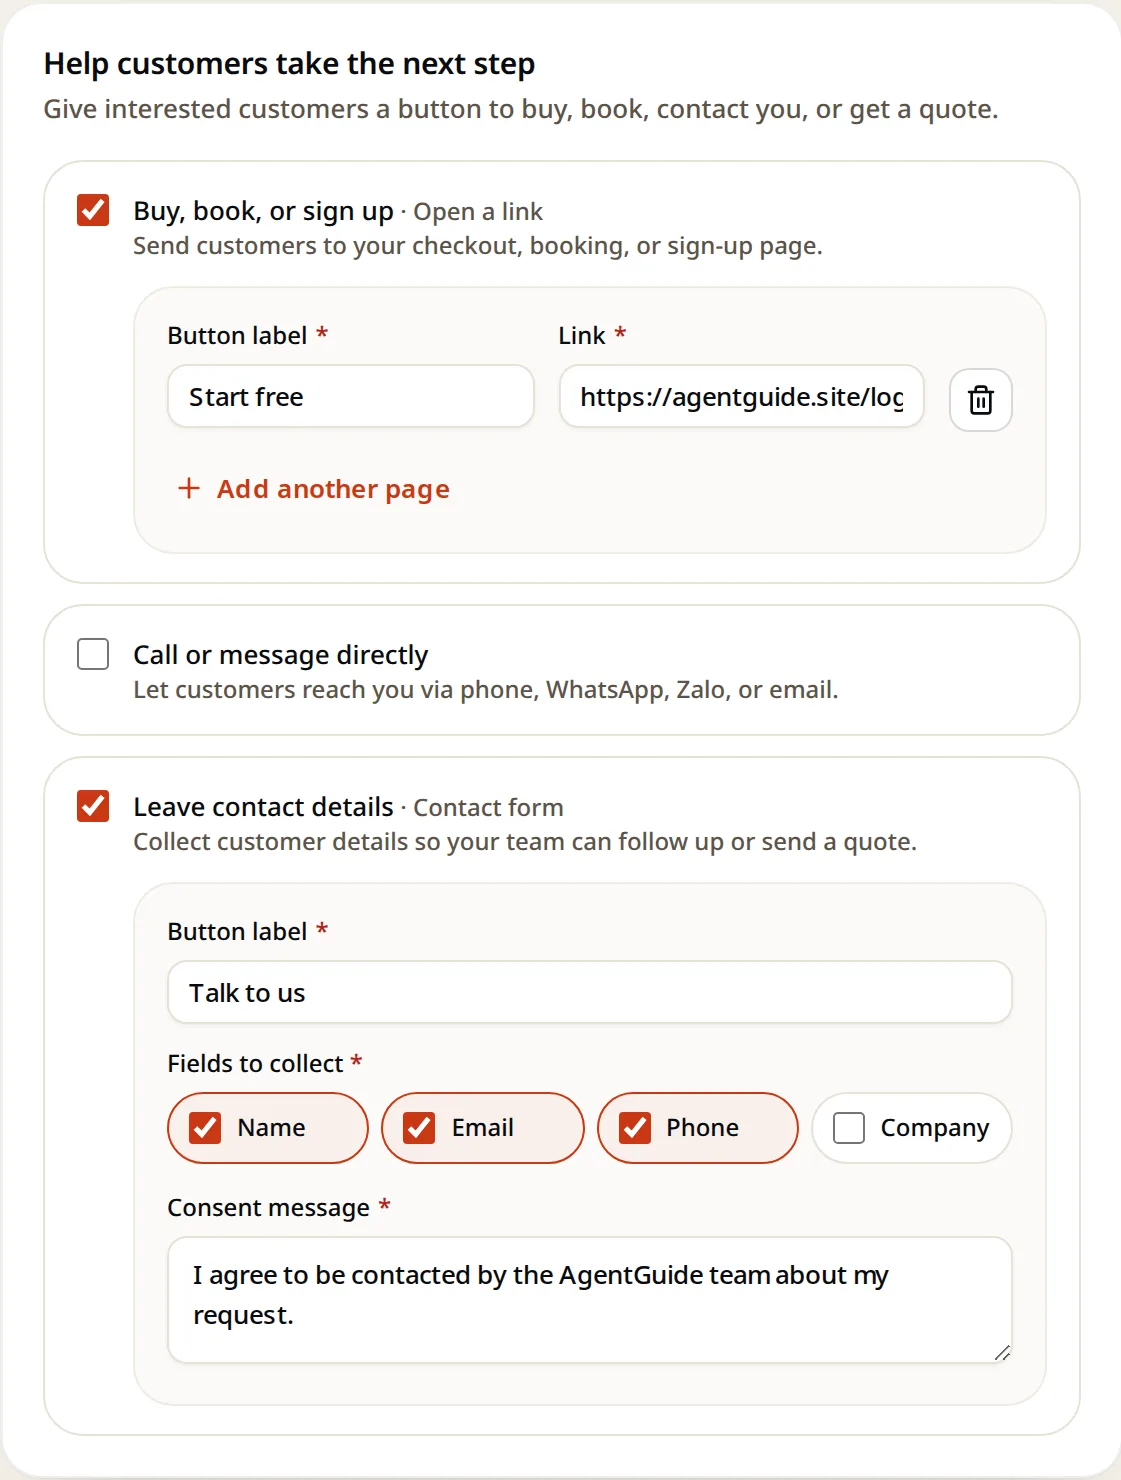
The agent offers these buttons when they fit the conversation. Two buttons is usually enough: one self-serve step ("Start free") and one human step ("Talk to us").
Step 4: Open the conversation on each page
Most visitors will not type first. Questions to start a chat puts two or three tap-to-ask questions next to the chat, so starting is one tap.
Make them specific to the page with Different questions for each page:
| Page | Questions |
|---|---|
| Home | Is this right for my website? · Can I try it for free? |
| Pricing | Which plan fits my team? · How are conversations counted? |
| Product page | Can it recommend my products? · How do leads reach me? |
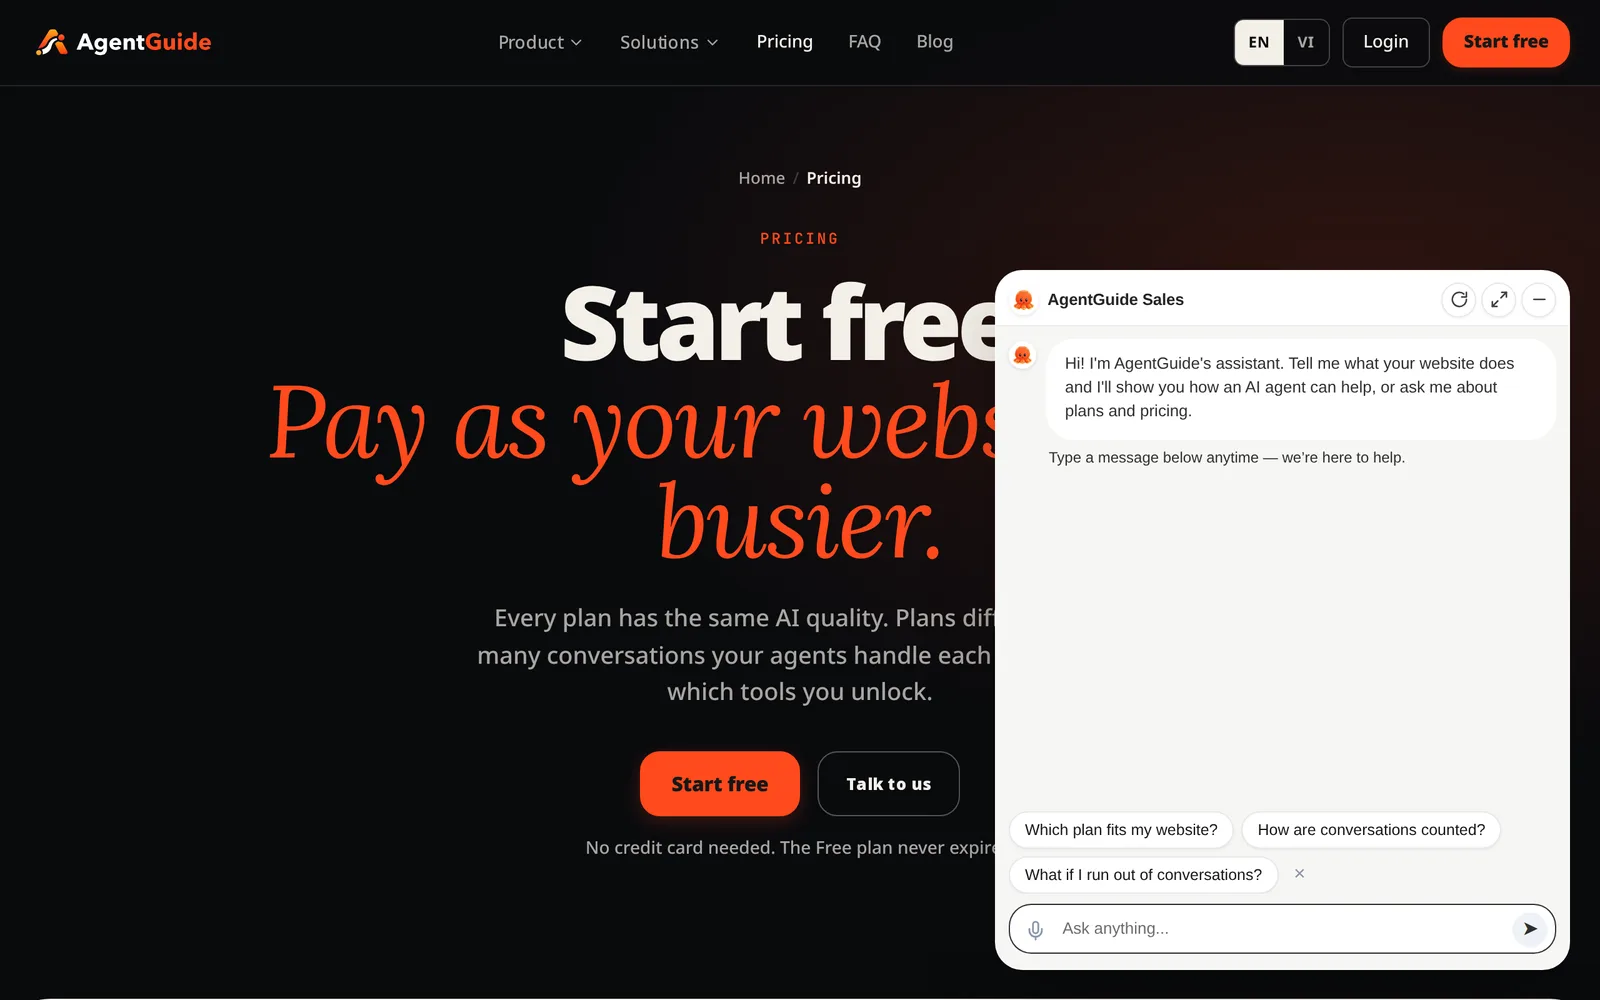
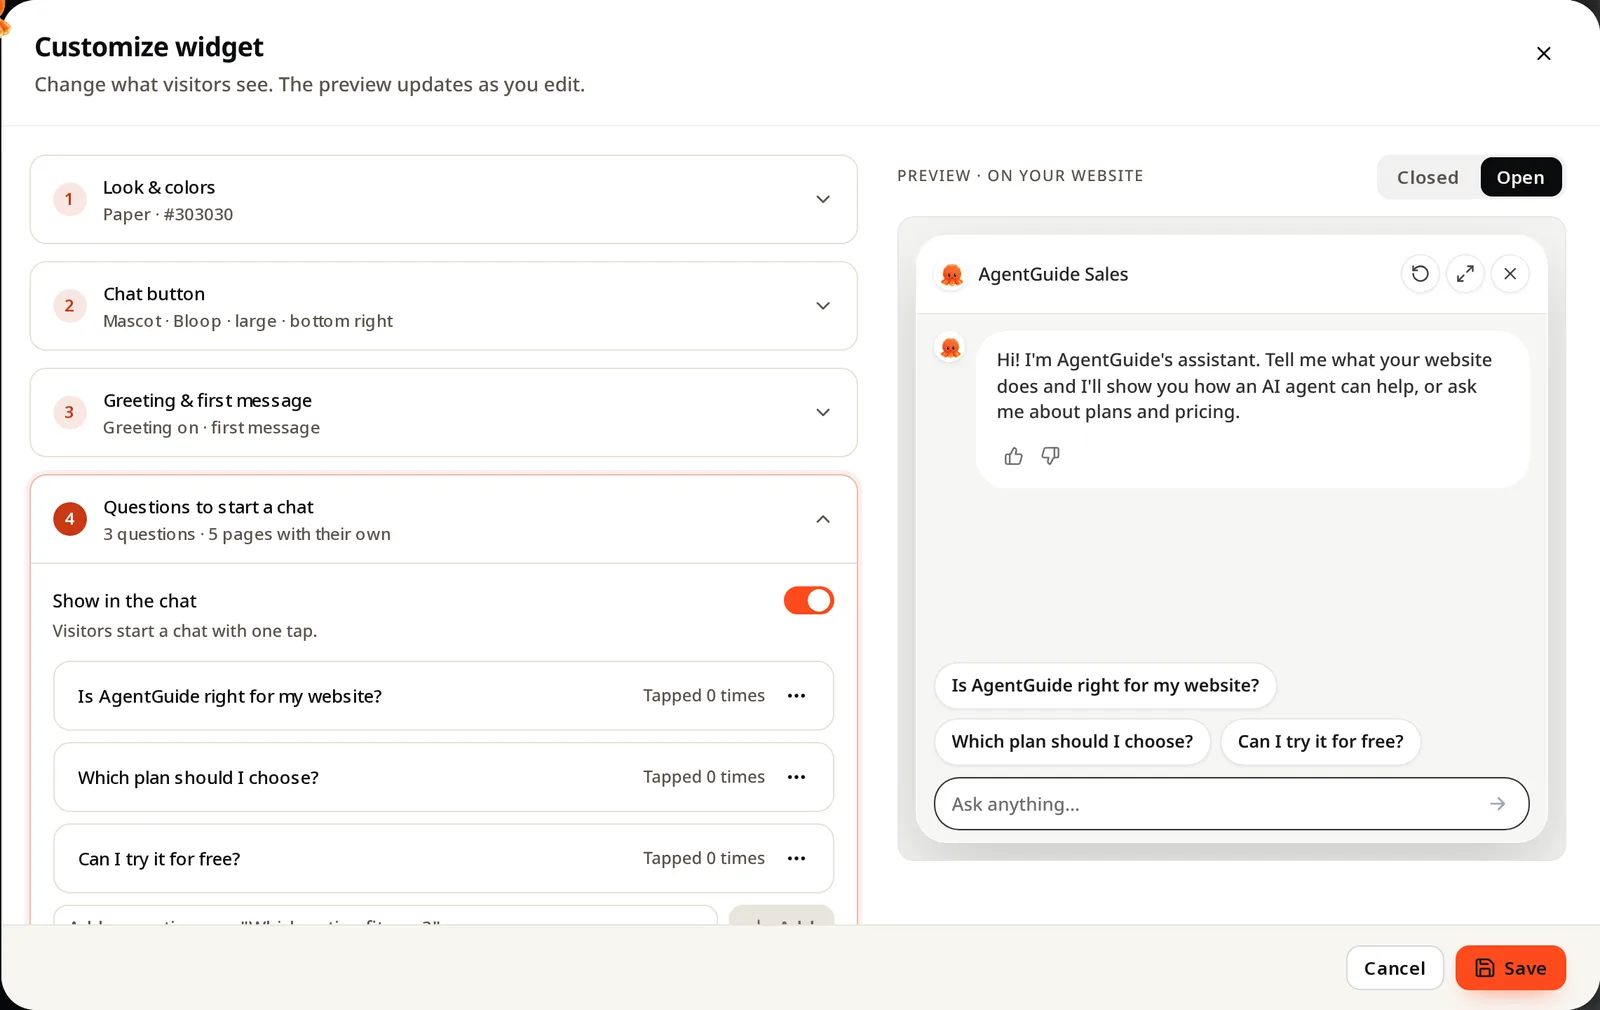
Suggest with AI drafts questions from your knowledge, which you can edit. Add a short greeting next to the chat button as well, for example "Comparing plans? I can help you pick one."
Step 5: Decide where leads go
Under Lead notifications, turn on email alerts. The addresses come from Account settings → Notifications, and new addresses confirm by email first. AgentGuide also supports Telegram alerts.
A lead alert is only useful if you can act on it without opening a dashboard. Each alert includes:
- the visitor's name and contact details;
- what they were interested in, such as plans or products;
- their goal and the details they mentioned, such as team size or deadline;
- the conversation, so you can see what they asked.
All leads are also listed in Customers → Left their details.
On Growth and higher, you can add lead scoring with your own qualifying questions, get an alert when a lead qualifies, and send leads to your CRM or other apps by webhook.
Step 6: Test like a buyer
Click Test agent on the agent page. Test chats do not count toward your conversation allowance. Ask what real buyers ask:
- "We are a team of 20, which plan?"
- "Is there a free trial?"
- "Do you integrate with [a tool you do not support]?" The right answer is an honest no.
- "Can I get a discount?" It should not invent one.
If an answer is wrong or vague, the fix is almost always the knowledge: add the missing sentence, then test again. Copy share link lets a colleague try the agent too. Chats through that link do count.
Step 7: Install and improve weekly
Install agent gives you one line of code and instructions for your platform. The window shows "Running on your-site.com" once it sees the agent on your site.
Then once a week:
- Read Customers → Couldn't answer and add what is missing.
- Look at Analytics: people who chatted, left details and won, top questions, and the pages where visitors click your buttons.
If you sell products, not plans
For online shops the setup is the same, with two changes:
- Import products from your website, or upload a CSV or JSON list, so the agent can recommend from your catalog with names, prices, images and links. Catalog limits run from 200 products on Free to 50,000 on Pro.
- Use the buy link as the main next step, and the contact form for questions about orders or quotes.
Summary
- Give the agent plans or products with prices, who each is for, and what you do not offer.
- Offer two clear next steps: one self-serve, one human.
- Put page-specific questions next to the chat so visitors start with one tap.
- Make sure every lead arrives with the need and the conversation attached.
- Test like a buyer, then fix gaps from the "couldn't answer" list every week.
Start free to set up your Sales Agent, or see how the Sales Agent works.